
In your excitement to launch your WooCommerce store, it’s tempting to just activate all the recommended plugins.
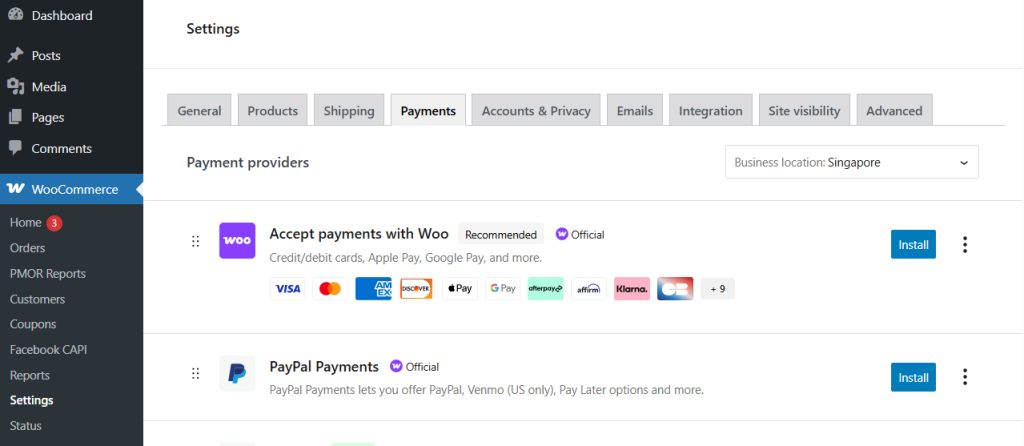
And when it comes to payments, the plugin that gets pushed front and centre is WooCommerce’s own WooPayments, as well as PayPal Payments.
Since they are both marked as “Official” and WooPayments is “Recommended”, it makes sense to use these, right?
Not necessarily.
You should know that WooPayments and PayPal Payments do NOT support PayNow. So, for local Singapore sellers, what to do?
One popular alternative is to install the Stripe payments plugin instead. That’s because Stripe allows you to accept credits card, as well as PayNow, and GrabPay.
Stripe is a well-known global payment gateway popular among online businesses for handling credit card transactions and other payment methods worldwide. It offers a smooth checkout experience and robust security features, making it a go-to choice for many ecommerce stores.
But PayNow for Stripe Comes With a Cost
Stripe’s PayNow feature are convenient, but it has a cost. It comes with a flat transaction fee of 1.3% per PayNow payment. This means for every $100 received, Stripe deducts $1.30.
Unlike bank-to-bank PayNow transfers that have no fees, this Stripe fee increases the cost of doing business and may affect your overall profitability.
Stripe charges 1.3% commission for PayNow payments
Why Does Stripe Take 1.3% for PayNow When PayNow Is Supposed to be Free?
The commission fees are not for PayNow itself, but for Stripe’s other features. For example, when a customer uses PayNow through Stripe, the payment doesn’t go directly into the seller’s bank account immediately. Instead, Stripe acts as an intermediary by collecting the funds first.
Stripe then sends a signal to your website that “payment has been received”. When your website receives this signal, it can immediately update the order to “ready to ship” status.
Impact of Stripe PayNow fees
Apart from the commissions, with PayNow for Stripe, there is also a delay between the time the customer pays, until the time the money reaches your bank. Essentially, Stripe treats PayNow as just another payment method under its broader gateway, and disburses all the payments according to their own settlement timeframe.
For example, home-based sellers or service providers who need quick daily funds might find the waiting period frustrating. These fees and delays make the Stripe PayNow option less attractive compared to direct PayNow transfers, which are free and immediate.
This is why many local sellers look for ways to use dedicated PayNow tools alongside Stripe to save money and access funds faster.
Use SGPayNowQR In Parallel With Stripe
There is a way for your store to accept as many payment methods as possible (e.g. credits cards, GrabPay), while enabling commission-free PayNow payments.
All you need to do is install a dedicated PayNow plugin like SGPayNowQR, and run it alongside Stripe.
By doing this, your PayNow payments will enjoy zero commission fees. Payments go directly from your customer’s bank to your bank account, without any middleman taking a cut. This means you keep all the PayNow money you earn, helping you improve your bottom line, especially if you receive many local transactions.
SGPayNowQR is designed with Singapore sellers in mind. Whether you’re a freelancer, SME, or event vendor, this toolkit matches how you work — quick, simple, and reliable payments.
How to Set Up Stripe Along With SGPayNowQR
1. Create Stripe Account
To offer your customers the convenience of paying via common payment methods, such as credit cards, Apply Pay, Google Pay, GrabPay and more, you will first need a Stripe account.
Create an account at Stripe.com (you will also need to connect your bank account so that Stripe can disburse funds to you)
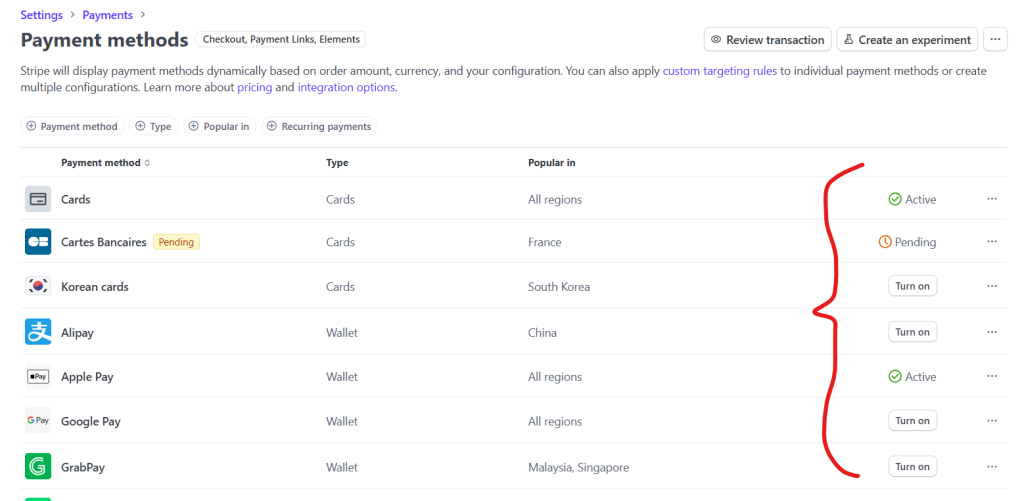
In Stripe.com settings, you can enable the payment methods that you want. However, you can leave PayNow turned off.
2. Install a Stripe plugin for WooCommerce
Now that you have a Stripe account, you need to install a plugin in your WordPress admin (assuming you already installed WooCommerce also). This lets your WooCommerce talk to your Stripe account.
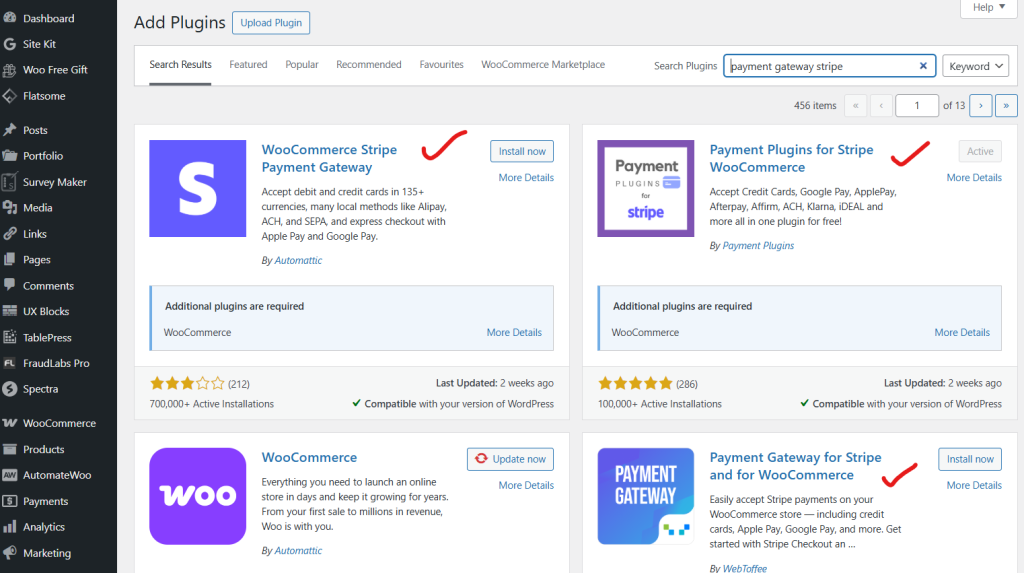
Head to your WordPress admin dashboard, go to plugins menu, and search for “payment gateway stripe”.
You will see popular plugins that will connect your WooCommerce to your Stripe. I recommend “Payment Plugins for Stripe WooCommerce” (the second one in the image below). Install and activate it.
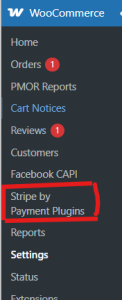
Once activated, navigate to WooCommerce > Stripe by Payment Plugins to setup your connection with your Stripe account.
3. Enable payment methods to appear in your checkout
Now you can enable or disable the payment methods that you want to show in your checkout screens.
Go to WooCommerce > Settings > “Payments” tab. You will see new payment methods that were added by the plugin.
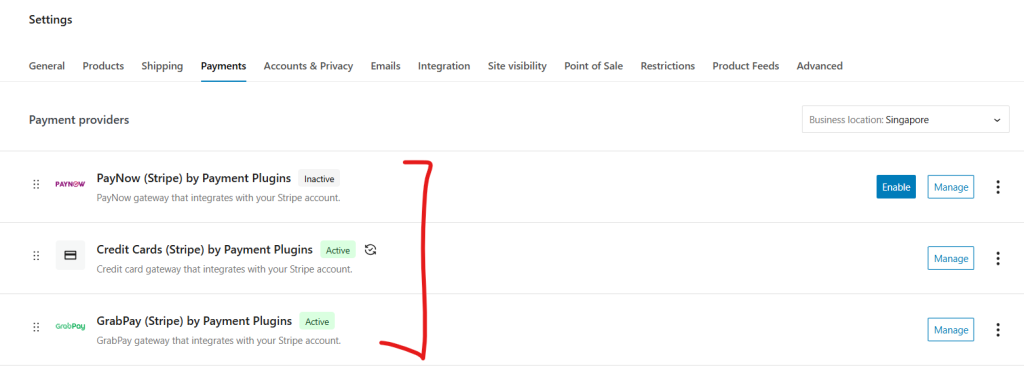
Enable the ones you want, such as credit card and GrabPay. But, don’t enable “PayNow (Stripe) by Payment Plugins” since that is the one that has commissions.
4. Add PayNow Separately Using SGPayNowQR Plugin
Since we want to have a PayNow option that doesn’t have commissions, we need the SGPayNowQR WooCommerce plugin.
You can download it from SGPayNowQR.com. Then, follow the installation instructions and you will see a new PayNow payment provider appear in your WooCommerce payment settings. Enable this PayNow provider.
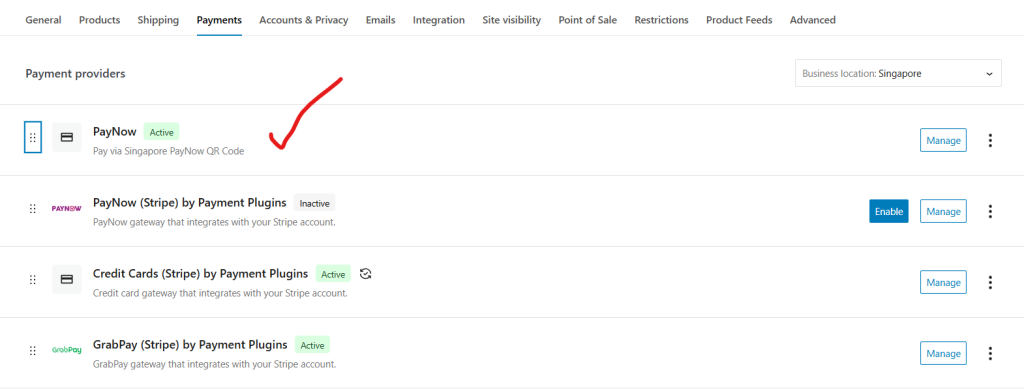
You will also need to go to the plugin’s settings and enter your UEN (Unique Entity Number) or your mobile number registered for PayNow. This setup links your business to the PayNow system, ready to generate QR codes for each order.
At checkout, SGPayNowQR automatically generates a unique PayNow QR code based on the order details like amount and reference number. Your customers simply scan this QR code using their bank’s PayNow feature to make an instant payment.
As mentioned before, the key difference here is that funds go directly to your bank account. They never pass through Stripe or any other middleman. This means no extra fees or delay; the money is yours immediately after the customer pays.
This approach offers your customers a familiar, fast way to pay locally, while you enjoy zero transaction fees and direct control over your payments. Plus, running PayNow alongside Stripe’s card and GrabPay options gives your store flexibility to serve all types of customers effortlessly.
Managing Orders and Payments When Using SGPayNowQR with Stripe
One key difference when accepting PayNow payments through SGPayNowQR is how you confirm those payments.
Unlike Stripe’s automatic payment confirmation system, PayNow payments made directly to your bank require manual verification. This means you need to actively check your bank account or mobile banking app to see if the payment has arrived.
Once you see the payment credited, you then have to manually update the order status from “pending” or “on hold” to “paid” within WooCommerce. This step is crucial because WooCommerce uses the order status to know when it’s safe to start processing and shipping the order.
While this may sound like extra work compared to Stripe’s automated updates, it also means you maintain full control and direct oversight of your funds, without waiting for intermediaries to process or confirm payments.
Let’s Start Selling!
If you’re a Singapore seller wondering whether to activate PayNow within Stripe, the answer is clear: you don’t have to.
While Stripe’s PayNow option is convenient, it comes with a 1.3% fee and slower fund access due to its payment routing. These factors may reduce your profits and affect cash flow, especially for small businesses or freelancers.
Using a dedicated tool like SGPayNowQR alongside Stripe offers a more cost-effective, flexible solution. Payments go directly to your bank account with no commission fees, allowing you to keep more of your earnings. You retain control over your funds, improving cash flow management.